This tutorial assumes that you have correctly imported your height map to Blender as a mesh from L3DT (or other software) or as a plane with displacement modifier. Your terrain objects should be scaled and positioned correctly in Blender before continuing. (TODO: Link to tutorials on how to do this)
Exporting Objects from Blender as FBX
Select all of the objects that you want to export.

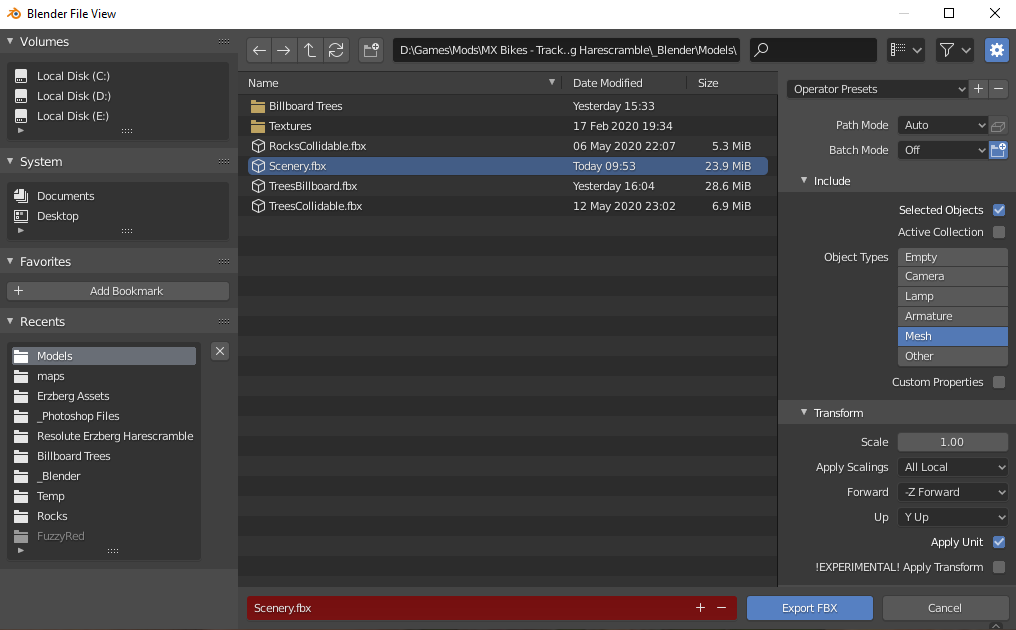
On menu, select File > Export > FBX (.fbx). When the export window opens, select the location and file that you want to save to. Also, be sure to check the “Selected Objects” box and “Mesh” object types. This will ensure that you are only exporting the objects that you selected and only mesh types.

Convert FBX to EDF
Start FBX2EDF.exe, which is part of the MXB track tools. Load your FBX file, make sure type is set to “Mesh”. In the Normals section, check the “Recalculate” box. Click the Save button to locate your save location and file name.


Once you are ready click the Convert button and the log in the console window will show. It will depend on the number of objects and complexity of them for how long the process takes. “Ending log” will display when the process is done.

Set up Scenes in your HMF and THT files
Open your HMF and THT files in a text editor. The HMF file is used for the display of the objects. The THT file is used for the collisions of the objects. You do not have to put your objects in both files. If all of your objects will be displayed only with no collisions, then you only have to add them to your HMF file. If they are displayed and have collisions then you will need to add to both files. If your objects are not displayed but have collisions, such as invisible walls, or invisible collision objects for trees then you only need to put those in the THT file. So, be sure to set up your FBX exports correctly. In most cases, you may have a mix of objects that may or may not have collisions – simply add the object scene to both files.
In the appropriate file, add the following block:
scene0
{
    name = Scenery.edf
    pos
    {
        x = 0
        y = 0
        z = 0
    }
    rot
    {
        x = 0
        y = 0
        z = 0
    }
}
Replace “Scenery.edf” with the name of your EDF file. This naming is assuming that the EDF file is in the same folder as your HMF and THT files. Adjust to include the relative path if you have them in another folder.
Your first scene will be “scene0” – for additional scenes that you add, simply increment the number for each new block.
Build
Build your trh and map files, then test your track in game or with Mapview.exe
Common Problems
- It is taking a really long time for FBX2EDF to finish – did you accidentally select your terrain object?
- My objects don’t show up
- Did you select them in Blender to export?
- Was the location and scale of your terrain object in Blender set correctly? Using mapview.exe, look under the map or in the sky for your objects.
- My objects don’t have textures or look strange
- Make sure that you have set up any SHD files correctly if you are using normal/spec maps for your object textures
- If you see different, random, textures on your objects, and you are using multiple EDF files, you most likely set the alpha on one of your objects in Blender. This is a bug in FBX2EDF and it doesn’t like when alpha is set on an object specifically.
Tips
- You can export all of your objects in one FBX file, or break them up into different groups of objects such as buildings, trees, etc.
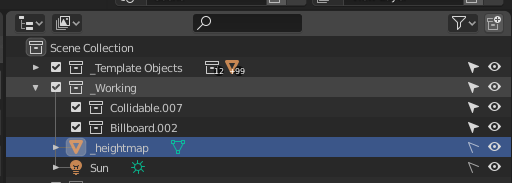
- Make sure that you don’t select your terrain object when exporting – in the filter drop down you can activate the “Selectable” filter in the Outliner so you can deactivate selection of an object so that you don’t accidentally export it.


helpfull 😀
itstitle
excerptsa
cheap enclomiphene buy online canada
discount enclomiphene usa seller
vente de kamagra sans ordonnance
kamagra en australie
androxal cheap price
purchase androxal generic medications
get flexeril cyclobenzaprine cheap info
order flexeril cyclobenzaprine purchase prescription
cheapest buy dutasteride low price
purchase dutasteride cheap with prescription
buying gabapentin usa buying
buy cheap gabapentin canada price
purchase fildena without prescriptions uk
order fildena american express
purchase itraconazole generic information
purchase itraconazole uk over the counter
canada staxyn non generic
get staxyn price netherlands
how to buy avodart purchase online canada
ordering avodart cheap buy online no prescription
cheap rifaximin without prescription
online order rifaximin cheap sale
how to buy xifaxan price in canada
can i take low dosage of xifaxan and levitra together
cena kamagra v lékárně
kamagra bez lékařských předpisů